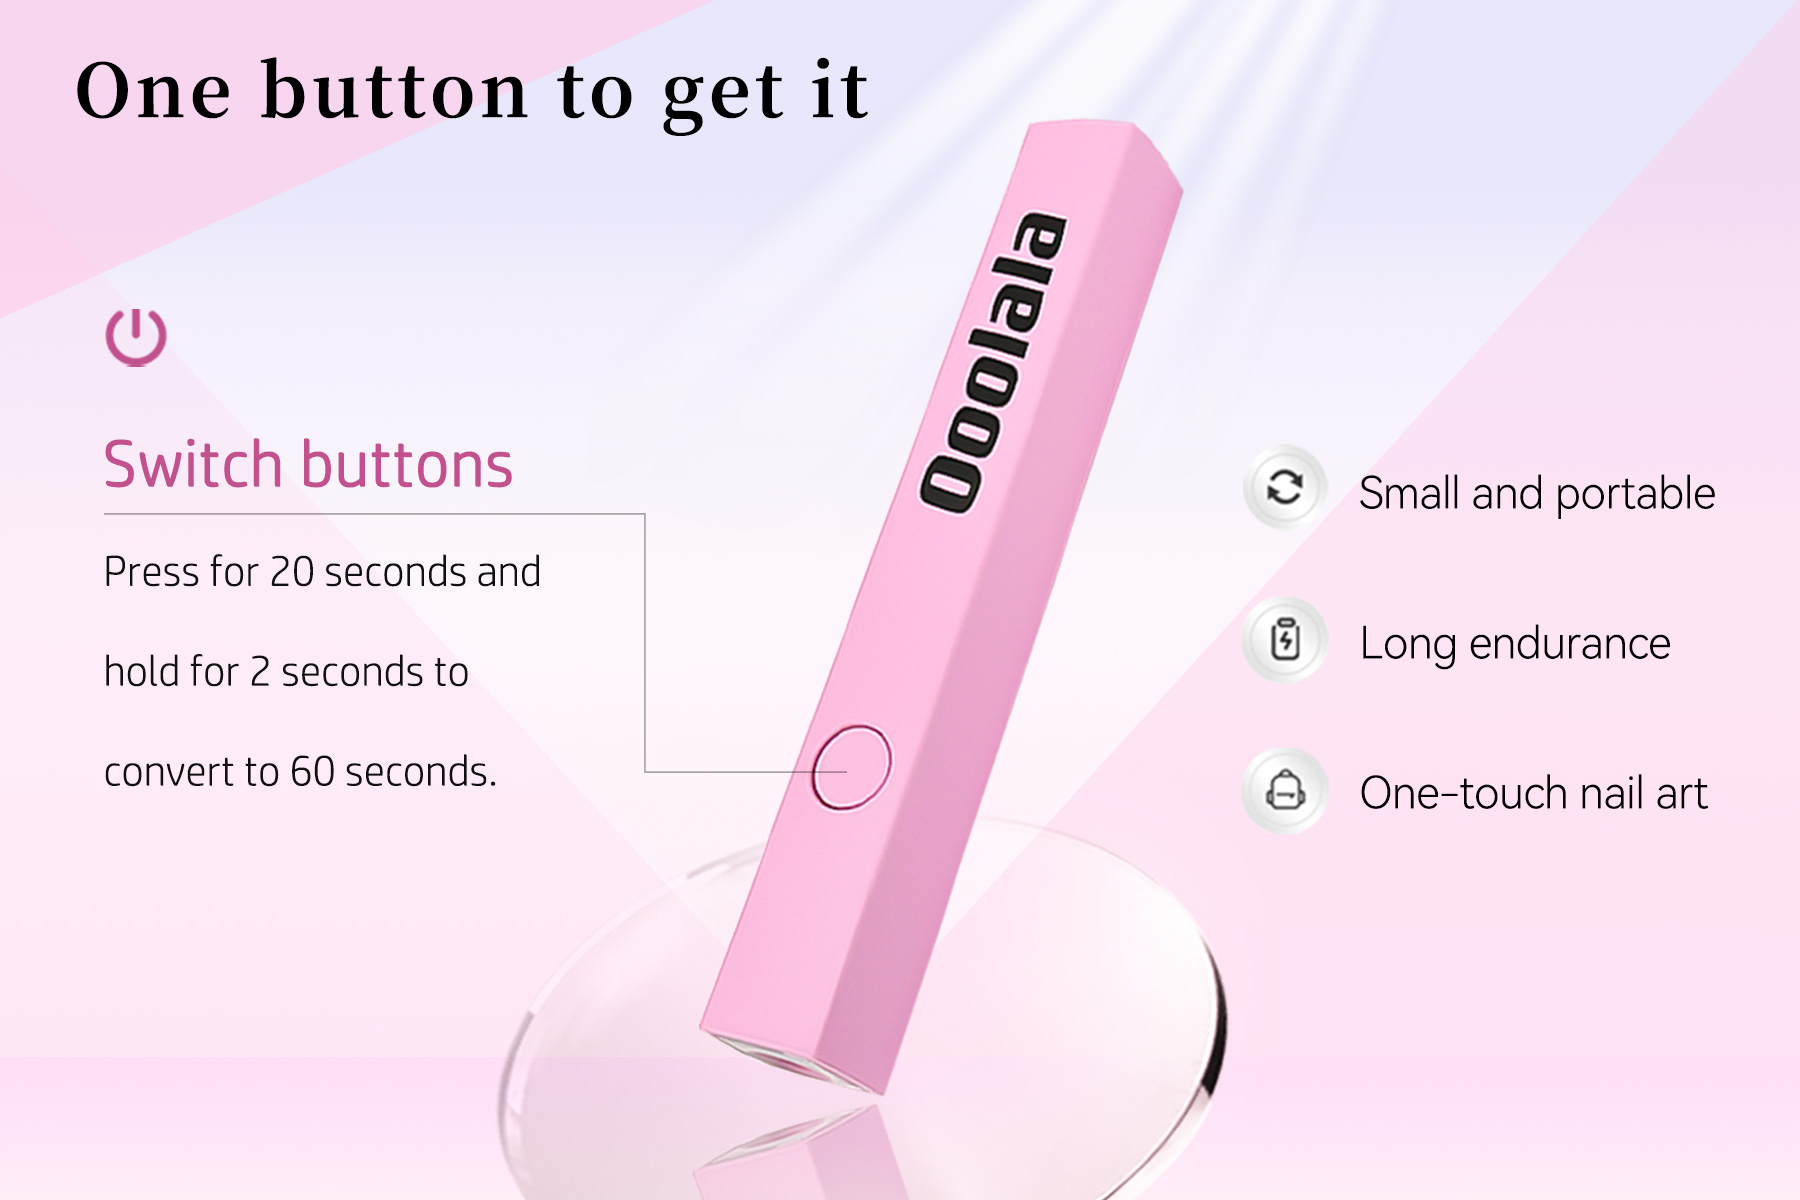
UV Jelly Glue Usage Tips:
1. No Need to File Nails
- You can use an alcohol wipe to clean the oils from your natural nails.
- Ensure your nails are dry before applying the gel for better adhesion.
2. Choose the Right Size Gel Strip
- Make sure the gel strip fits your natural nail perfectly.
- After pressing and smoothing the gel, ensure there’s a ring of jelly gel around the edge of the nail. This prevents water from getting in and keeps it from snagging on hair.
3. Press After Applying Nail Tip
- After placing the nail tip, press it down to bond it securely with the gel. This ensures a stronger hold.
4. Curing Time
- Depending on the lamp you’re using, adjust the curing time. Cure until the nail feels secure, with no shifting or lifting.
- If your nail tips have decorations, extend the curing time for extra hold.
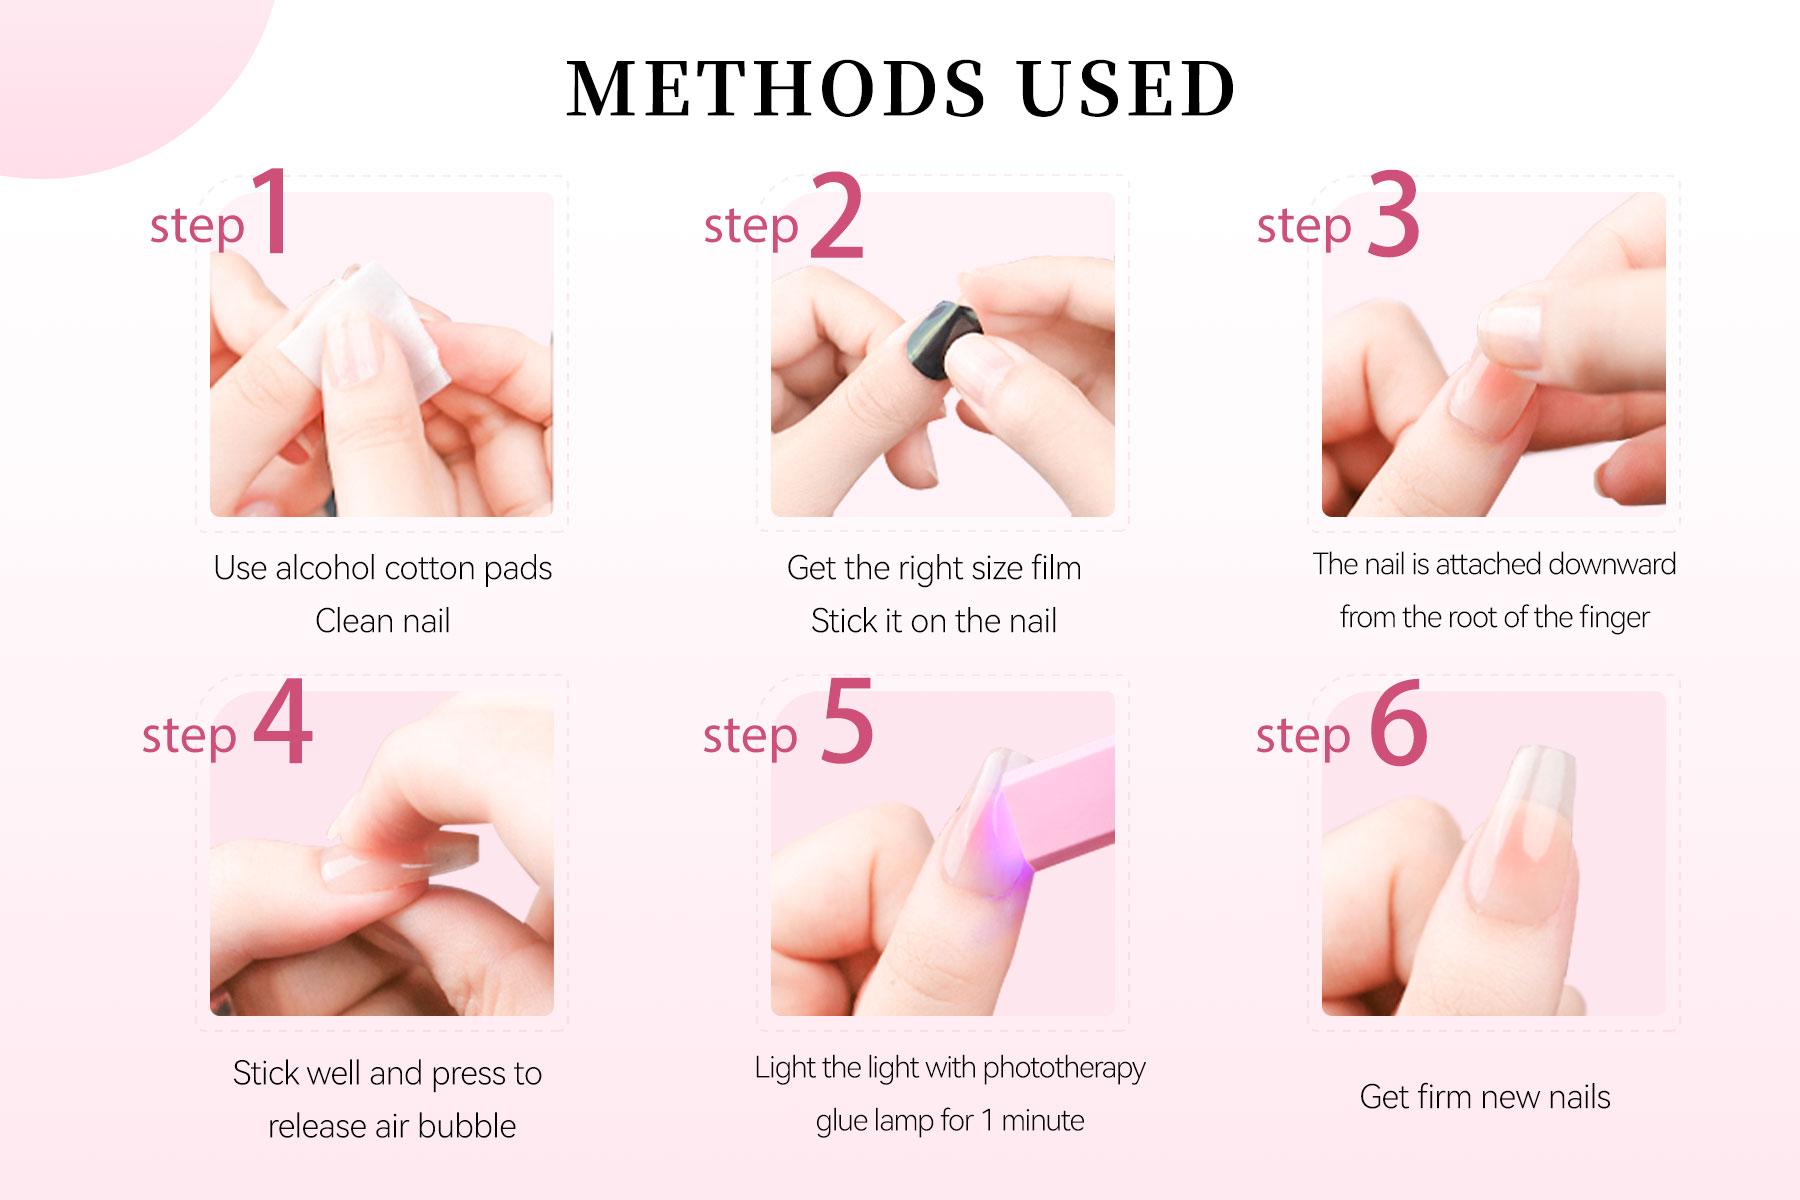
UV Jelly Glue Application Tutorial:
1. No Filing Required
- Clean your nails with an alcohol wipe.
- Choose a jelly gel strip that fits the size of your nail and apply it evenly.
2. Peel Off the Protective Film
- Place the nail tip directly onto your nail.
- Press down firmly to ensure no gaps at the edges.
3. Curing
- Without cleaning off excess gel, cure under a UV lamp for 60 seconds, and you’re done!
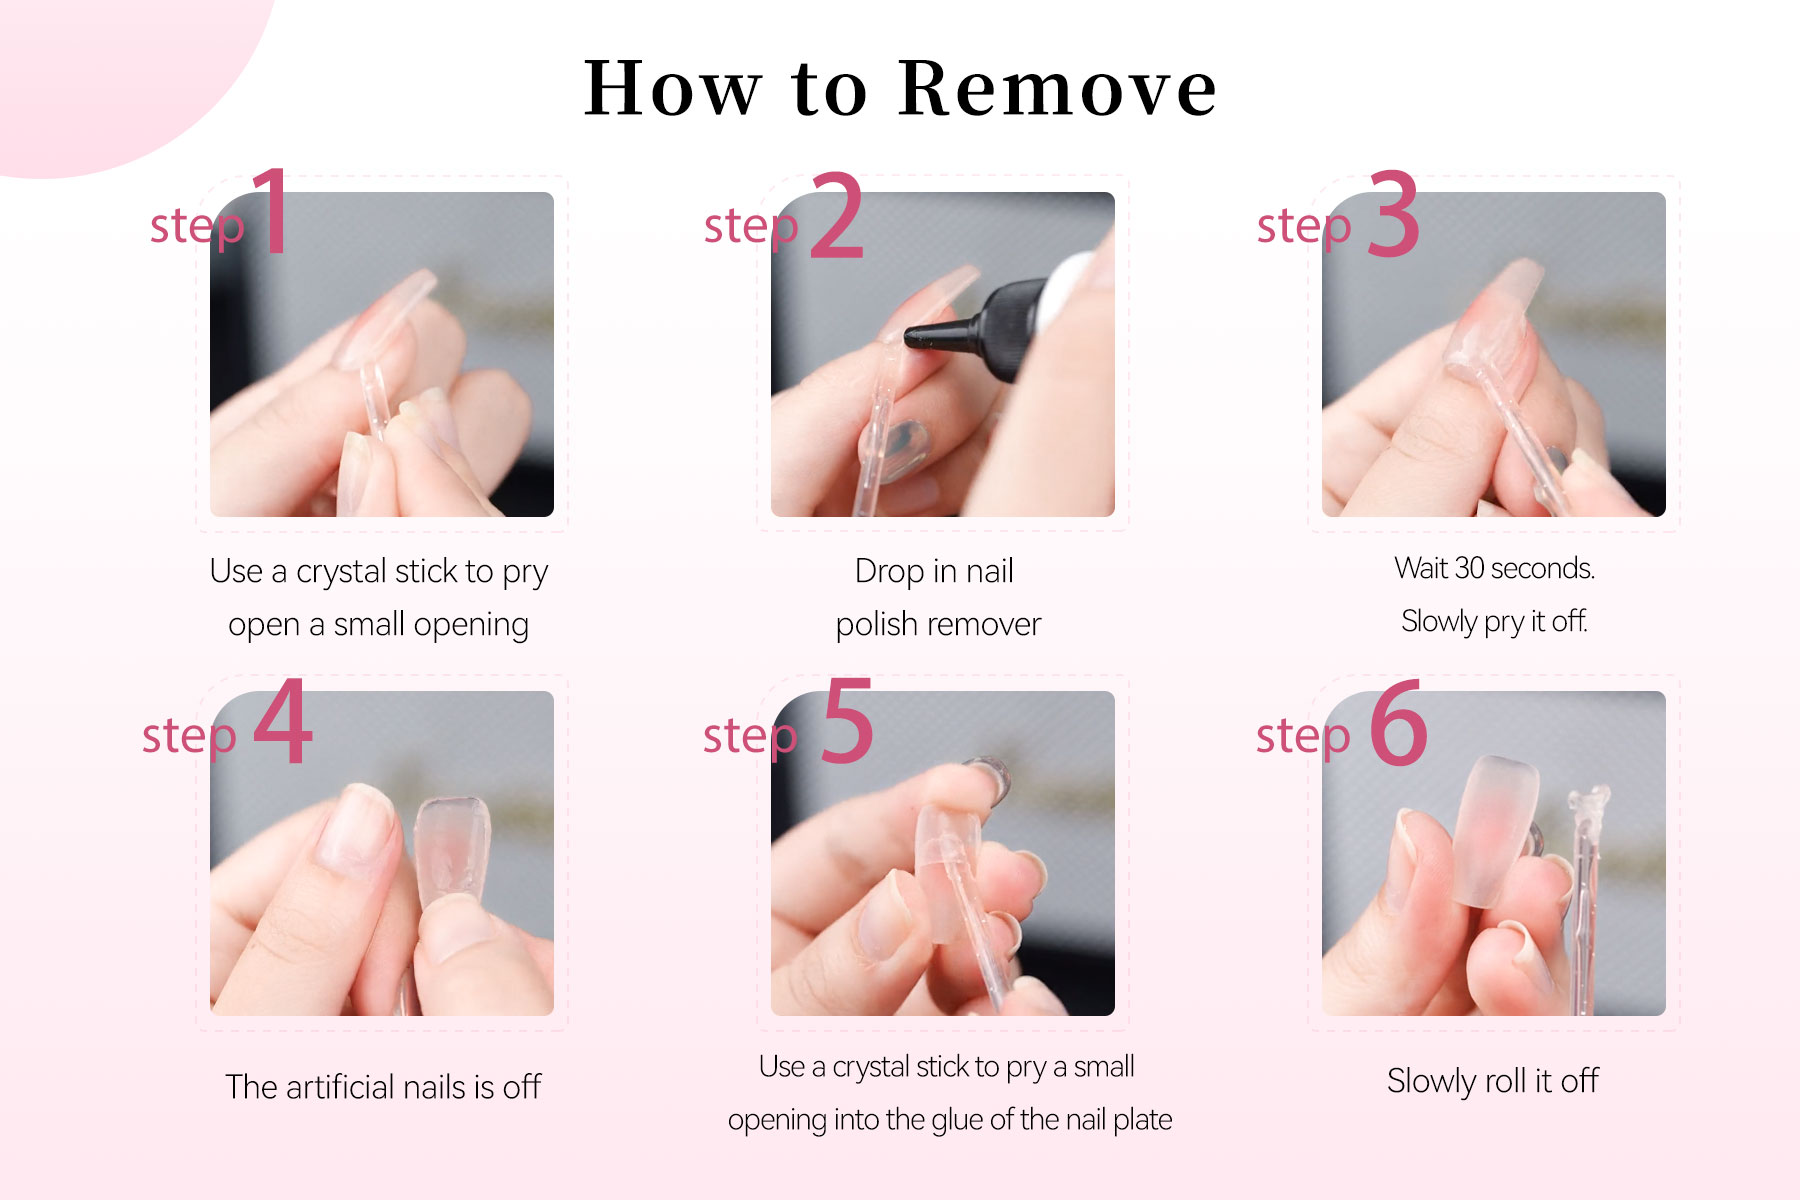
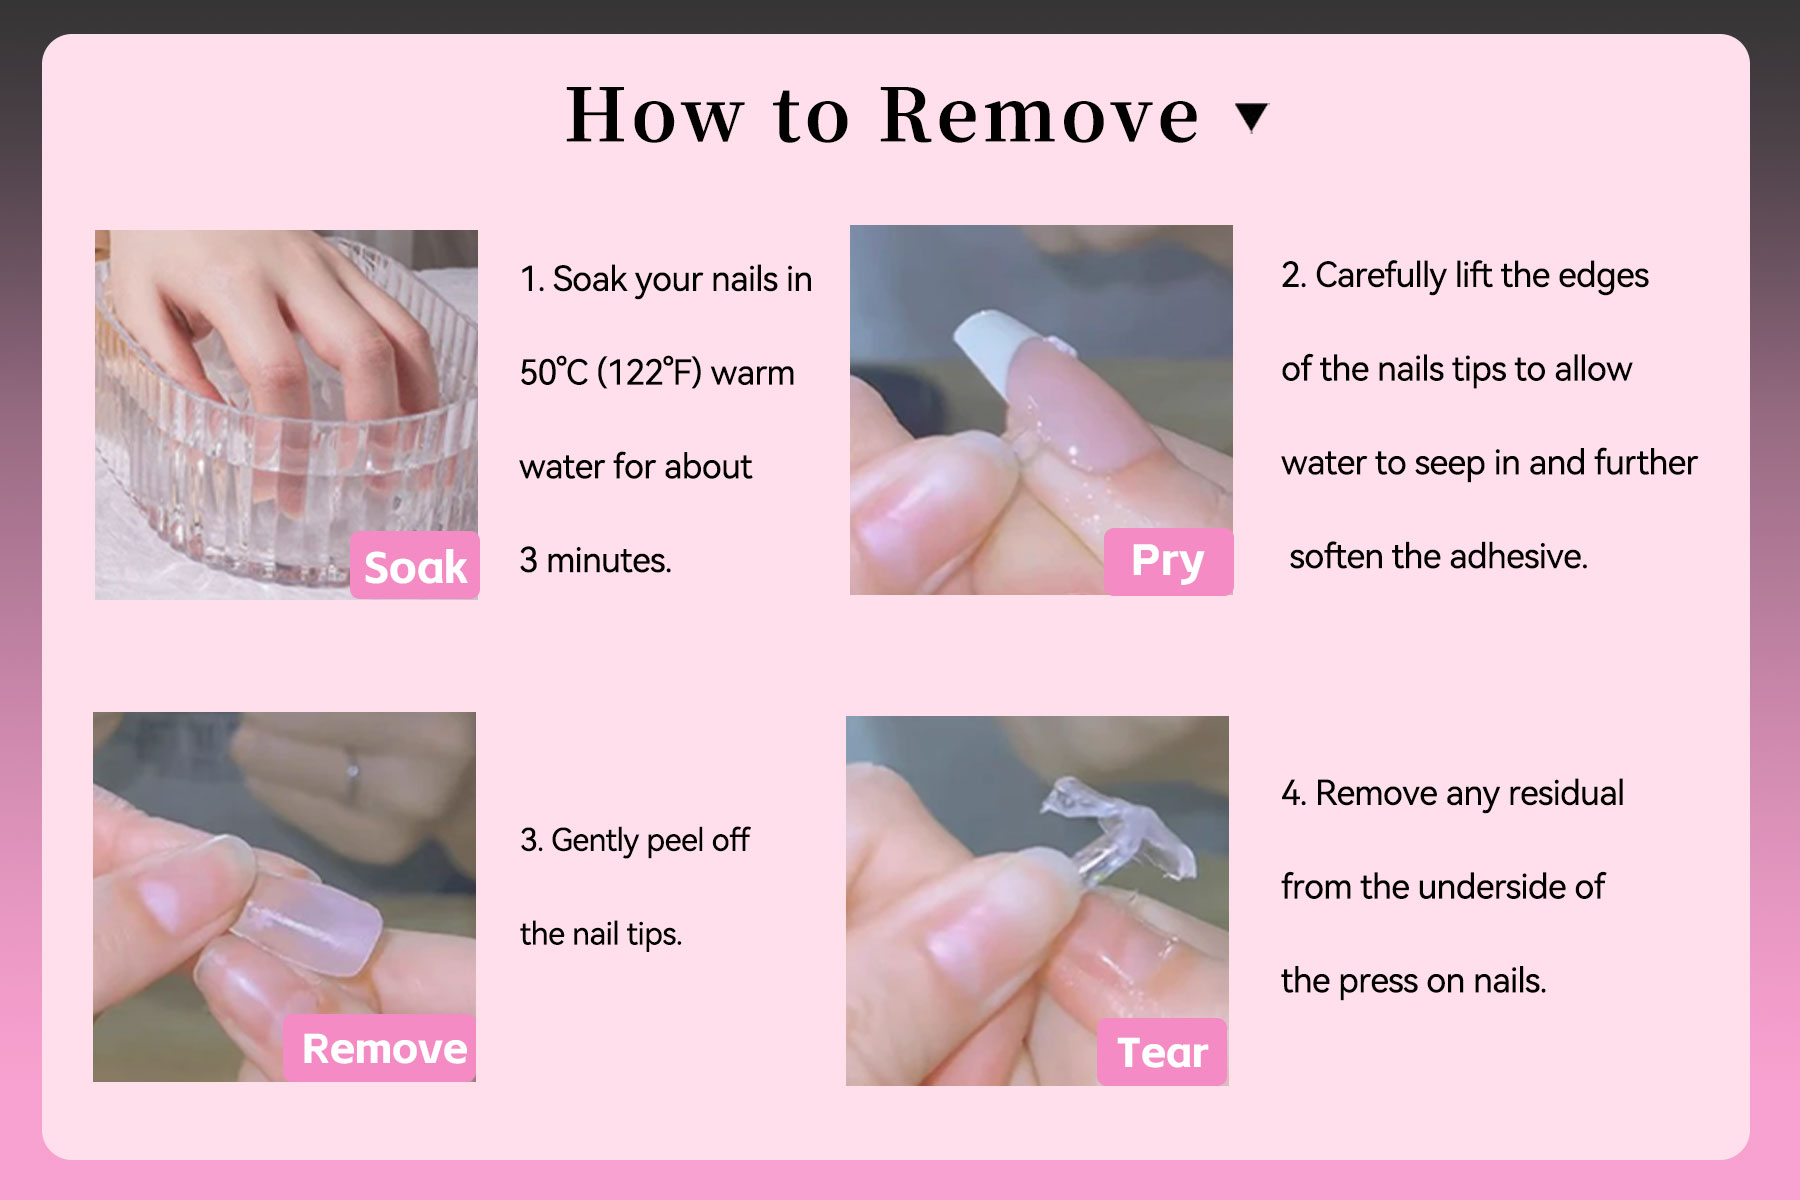
4. Removal
- To remove, use the provided nail remover solution or Ooolala Meijia Nail Glue remover pen.
- Gently pry open a small gap, insert the remover liquid, wait for 30 seconds, and lift the tip. The gel on the nail tip will come off easily, making it reusable.
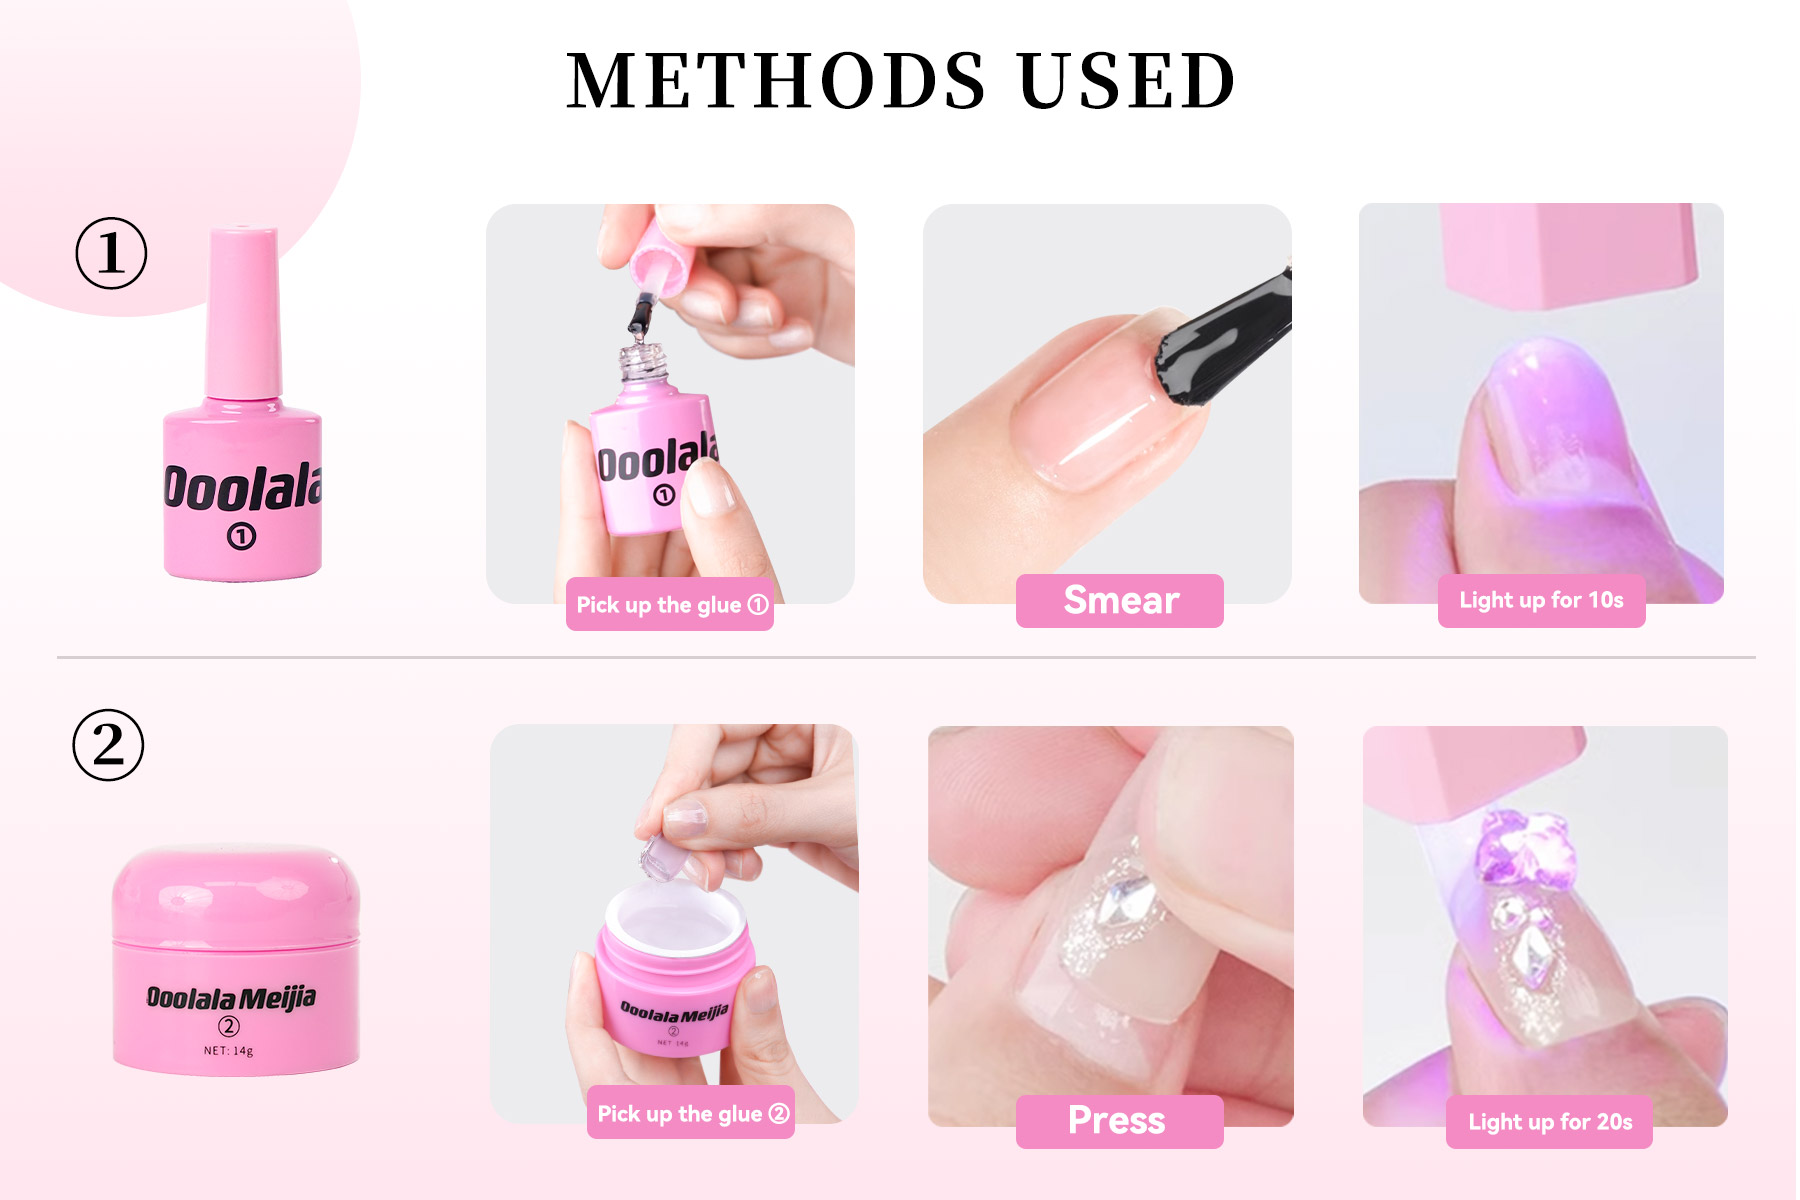
Detailed Glue 1 & Glue 2 Application:
1. Apply Gel 1
- No need to scrape the bottle, just apply directly. One dip of the brush should be enough for all five fingers. Gel 1 is key for strong adhesion.
2. Cure Gel 1
- Cure under a 50W+ nail lamp for 90 seconds or under a small handheld lamp for 10 seconds until it turns into a jelly-like consistency.
3. Apply Gel 2
- Scoop out a small, pea-sized amount of Gel 2. For flat nails, add more to increase thickness.
- Press down to remove any bubbles and clean up any excess gel. Cure under a lamp for 20 seconds.
4. Finishing Touch
- If you’re using dark or black nail colors, be sure to use a handheld lamp to cure any hard-to-reach areas. Once cured, your nails will be perfectly set!
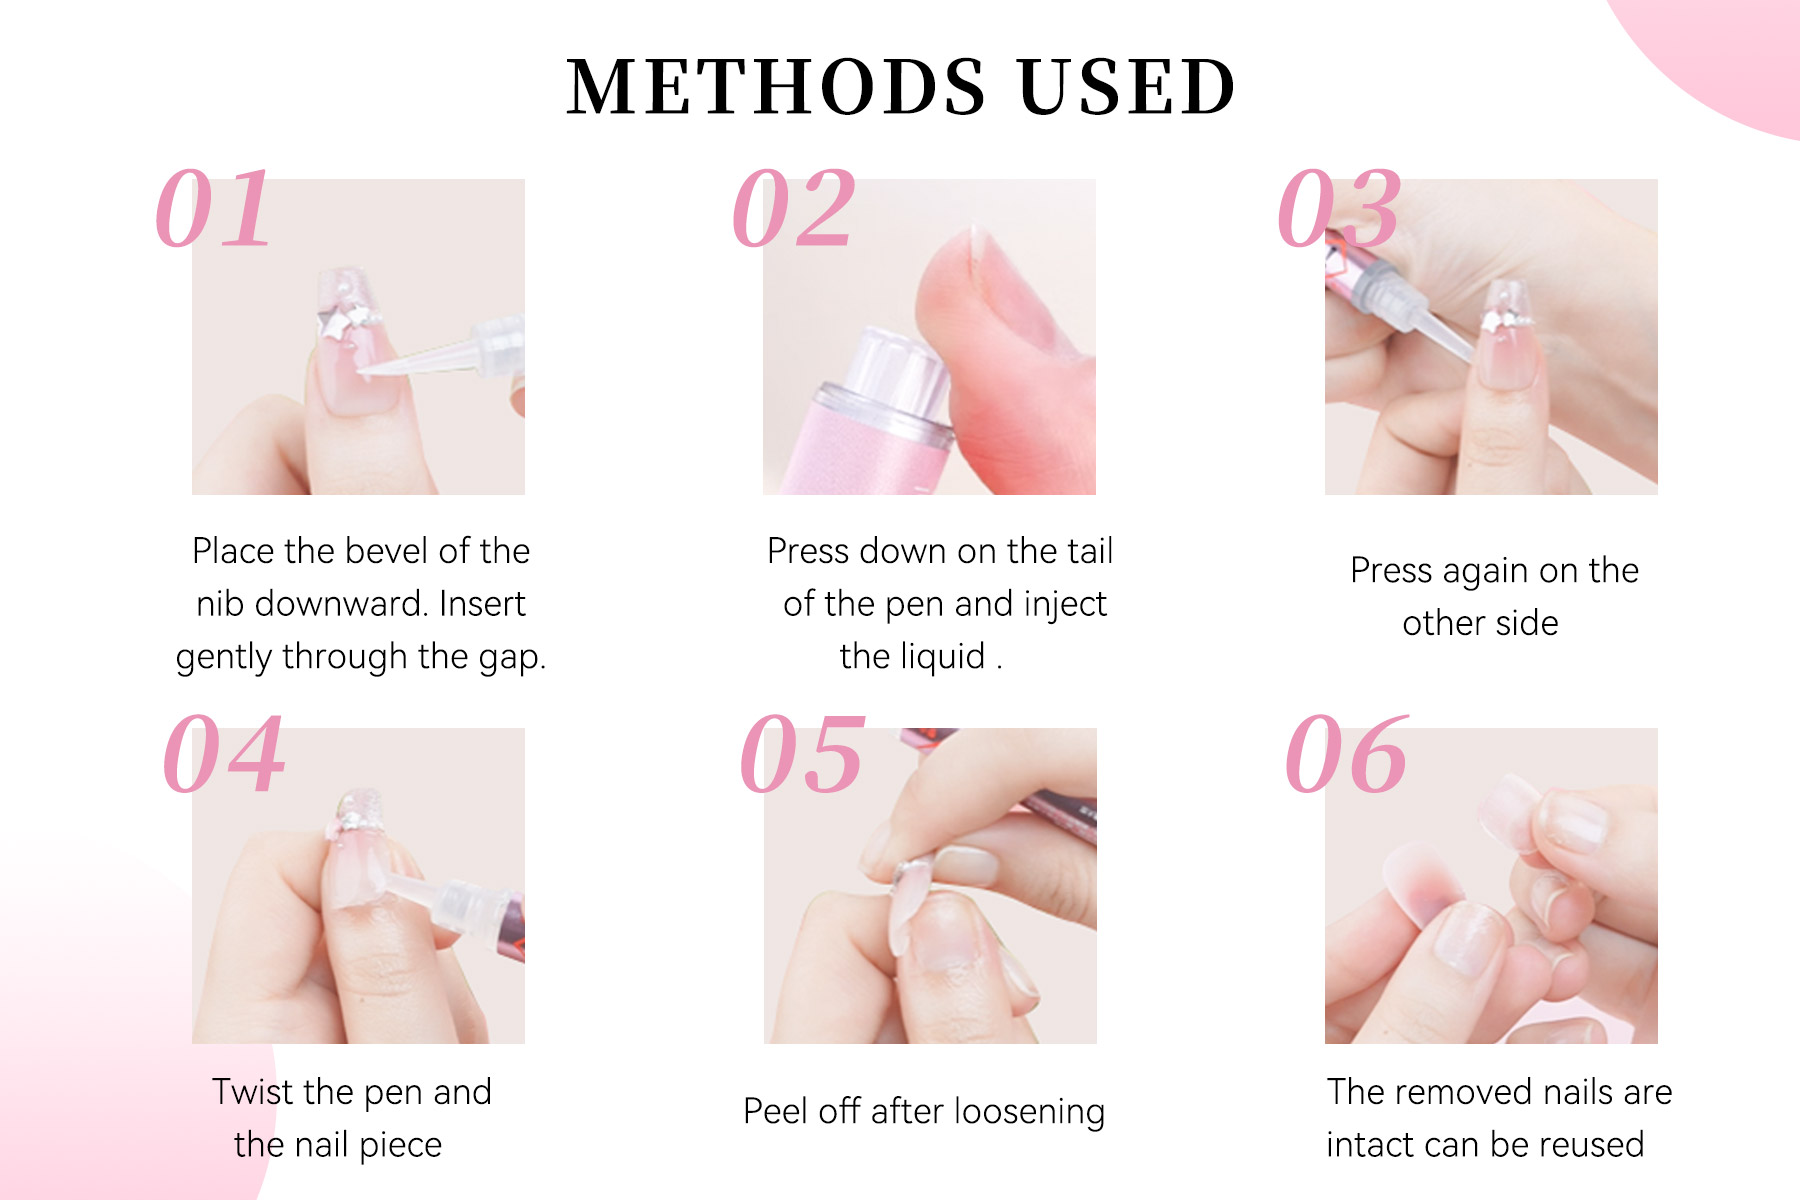
Nail Glue Remover Pen Tutorial:
1. Prepare the Pen
- With the tip angled down, gently insert it between your nail and the tip.
2. Inject the Liquid
- Press the pen to release the remover liquid into the gap. Repeat the same process on the other side.
3. Gently Twist
- Gently twist the nail tip with the pen until it comes loose. The gel can easily be peeled off without damaging the nail or tip, making it reusable!
UV Nail Glue Lamp Tutorial:
- Press the indicator light once for 30 seconds, or press and hold for 2 seconds to switch to 60 seconds. Press 3 times to close.
- The red light indicates charging, and the blue light indicates a full charge.
- The product can be used while charging.
- The product has a usage time of 40 minutes on a full charge.
